Reindeer Light Repair
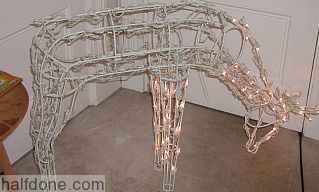
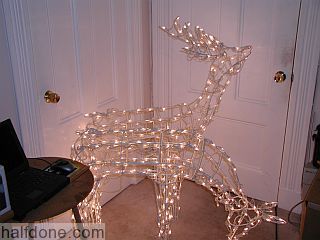
Today I got the special privilege of fixing the lights on the two reindeer my mom puts in the yard. After getting kicked around the yard and the garage for the last 11 months both looked like this. I would guess each has about 150 lights, 300 total, in which only half of each worked. Of course fixing Christmas string lights is HELL.
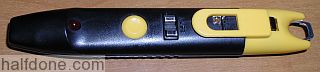
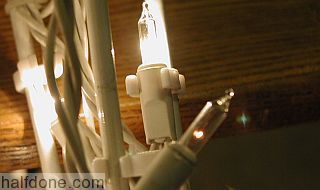
Recently I was looking at the How Stuff Work website (and it's a great site) and one of the questions posted there was How do proximity-type Christmas-light testers work?. I didn't even know they existed, I would have picked one up years ago. The guy at Sears didn't know about it either when stopped by the mall. He was nice enough to check it for me and said they stopped carrying them last year because they didn't sell. I bet it would if anyone knew about them. The local Radio Shack did have one though. These things can be quite useful, has a built in bulb/fuse tester and bulb removal tool. The removal part, which is on the right side on this picture, is designed so you stick the metal outside edge between the socket and the bulb and twist the tester so it pops out. They designed it like it you should put the bulb in the metal ring but that is not the case.
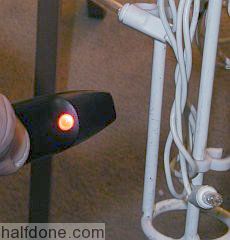
The selling point of this device is the ability to detect voltage on a line without actually making contact with live wire. The whole reason I got it was so I can avoid removing 150 light bulbs and testing them on the working half. I tried it out on the reindeer and find this part useless. Regardless where I point the device, even several inches away, it lights up. I assume that the metal frame of the deer is preventing it from working correctly. I will have to try it out on simple string lights for the porch later.
So if this isn't going to work then lets see what I can do with a multimeter. I'm learning electronics and these lights are just parallel and series circuits, should be a simple. Setup my multimeter for ohms, connect one of the probes to one end of the circuit (like the plug) and pull out a bulb and test the contacts.
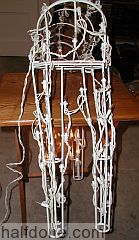
I mounted the deer on my little table at an angle for easier access to the rear lights for the multimeter probes, starting where it plugs in. (For the perverts in the crowd, shut-up).
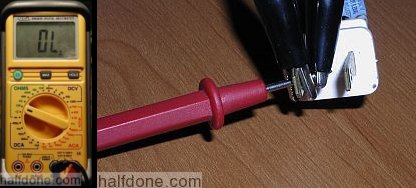
I get out my nice multimeter a friend of my dad gave me and set it to 400 Ohms. Sometimes I had to switch it up to 4k ohms during some of these tests, shouldn't need to do so on auto sensing models. While the Beep mode might work for a while it will NOT work once you get past the first few bulbs which I only realized after almost destroying one of the sockets trying to get it to beep. I also connected one of the probes to ONE blade of the plug, didn't seem to mater which one you use. I used some alligator clips to keep it in place.
First I thought about testing these lights by playing that old game of Guess a Number Between 1 and 100. The most efficient way to play that game is to work in halves. First you pick 50 and they would say that is was less. Then you pick 25 ...etc. The difference between this and the game was the high likelihood of more then one broken bulb. But I then thought it would be better to just step my way around the yard ornament.
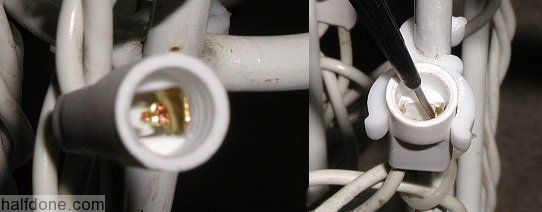
So I followed the power cord to the first bulb and pulled it out. If you look inside one of the sockets you will see two contacts. Power runs from one contact, though the light bulb to the other one. When the multimeter is running in Ohms mode it sends a little bit of power down though the probes and measures how much gets back (measuring resistance). When the probes are not connected it shows "OL" meaning Over Limit (the resistance is so high it can't detect anything coming back). When it reports any other number the probes are connected in some way. For our simple xmas light testing we just want to see if any numbers are displaying. I connect the other probe to one of the contacts. Only one of the contacts should show numbers on the multimeter. If the first light socket does not then there is a problem with the wires or the multimeter and it's leads. You can test the multimeter just by touching the two probes together.
Once the first one shows something on the display I jumped five or six lights and tested it again. I always found a problem during this jump, dumb luck I guess. I get nothing on light six so leaving out the bulb for number six I jump back to number three, finding it not working either I left that light out also and jump to light two. That worked so it sounds like a bad bulb for number two. I stick in number six's bulb in number two and test number three again and that works fine. Stick in number three's light back in and number six still doesn't work. Jump to number five and that tests fine so I guess bulb for two and five are bad. Do this another 30 times and see if you can keep your sanity
My xmas light tester has a nice bulb and fuse tester built in. The type of plastic plug that the light has at it's base is too long to just stick in the bulb tester so I removed the bulb from the plastic and connect the bulb wires directly to the contacts on the tester.
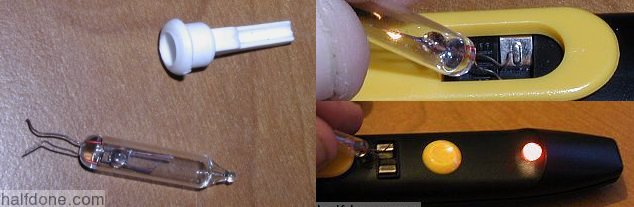
These lights don't have a fuse like most but another feature of these mini light bulbs is that it has a small shunt that kicks in when the bulb blows so the bulb doesn't light any more but power still flows though it. So I use the fuse tester to check if the bulb has blown but still allows power to flow. I stole some replacement from another set of string lights.
After going though about 15 lights, several times back tracking because of loose connections I get another section working. String lights usually have several sections with several lights on each section. You can see where each section starts/ends by looking for a length with only two wires instead of the typical three. Usually the first bulb of each section is larger and takes in three wires instead of two. You always want to test these bulbs first since it can take the whole string down. It also the best place to put in a blinker light for that same reason. Another odd thing I didn't expect was that the replacement lights I used from another set are very dim compared to the rest. I even changed sockets without change. I didn't expect xmas lights to have different specs.
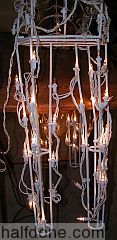
Another 3 of so hours of testing lights (and intermittent chatting on IRC of course) I got it all working! I even threw in a new red bulb for the nose. What a pain in the butt to fix.
End results: 10 dead bulbs, 3 blown and one blinker that some how got in there.
Update
The tester does work great with your normal string lights, saved me a good amount of time to fix several I had. You want to point the sensor at the lights and not the wires and it also seems to matter which way you plug in lights, the ones I have don't have a polarized plug.